Go
Getting started with Go
To code against the raw Go SDK, you'll need to install Go and the Golang SDK. Alternatively, you can code against one of the multiple language wrappers, which give access to the SDK. You can find the Go SDK here.
The Golang SDK communicates with these other languages using RPC calls (in both directions), and the wrappers in the background interface using Thrift. This is not exposed to you as a developer; you work with the Interface layer in your language of choice. We've got SDKs in the following languages:
Working with Go source files
Prerequisites
- Install the newest Go command line.
- If you do not have it, install git.
Get started
- Create a $GOPATH environment variable: (for example, on unix do:
export GOPATH=/home/pi/go). - Get Apache Thrift and use the 0.10.0 branch:
a.
go get git.apache.org/thrift.git/lib/go/thrift/...b.cd $GOPATH/src/git.apache.org/thrift.gitc.git checkout 0.10.0 - Get the SDK:
go get github.com/WPTechInnovaion/wpw-sdk-go/...
Note
Make sure you ignore the rpio.go system-specific warnings.
Running the examples
Now you've got everything set up, you're able to build the examples inside: $GOPATH/src/github.com/WPTechInnovation/wpw-sdk-go/example
Each example consists of a sample producer and a sample consumer:
- $GOPATH/src/github.com/WPTechInnovation/wpw-sdk-go/examples/sample-consumer
- $GOPATH/src/github.com/WPTechInnovation/wpw-sdk-go/examples/sample-producer-callbacks
To test the communication, build and run the producer:
cd $GOPATH/src/github.com/WPTechInnovation/wpw-sdk-go/examples/sample-producer-callbacksgo build./sample-producer-callbacks
In a separate terminal window, build and run the consumer:
cd $GOPATH/src/github.com/WPTechInnovation/wpw-sdk-go/examples/sample-consumergo build./sample-consumer
Creating your own keys
You can do this whenever you want, but you're going to need to create your own API keys. These keys allow you to simulate payments and see the outcome, rather than just using the keys Worldpay included in their SDKs.
Warning
Make sure you only use test keys.
To add your own test API keys:
- Login to Worldpay Online.
- Go to Settings.
- Then click API Keys.
- Grab your Service key and Client key. They'll look something like this:
T_S_fd00db67-b77b-4d6e-1a2a-45f65123f795. - Find the config folder of the SDK and find the producer JSON files.
- Add your Service and Client keys:
- The
pspConfig.merchant_client_keyandpspConfig.hte_public_keymust have the same key. - The
pspConfig.merchant_service_keyandpspConfig.hte_private_keymust have the same keys.
- The
- Save your work.
Once you've added your own test keys, you'll be able to start testing your payments.
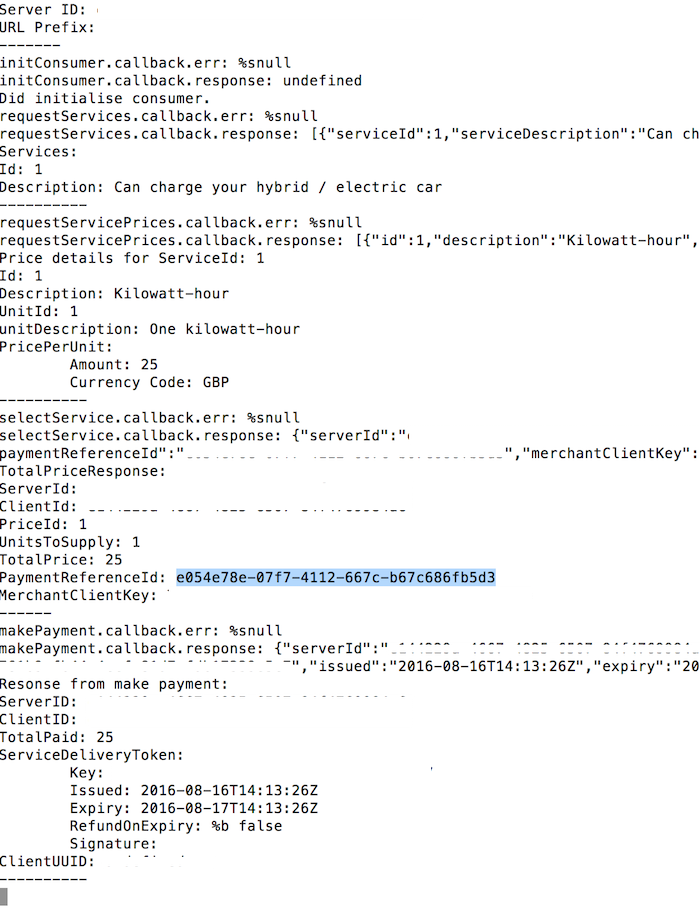
Seeing your payments
Now that you've added your own test keys to the producer config files, you can start testing your payments. Refer to the Run the examples topic for more information about this.
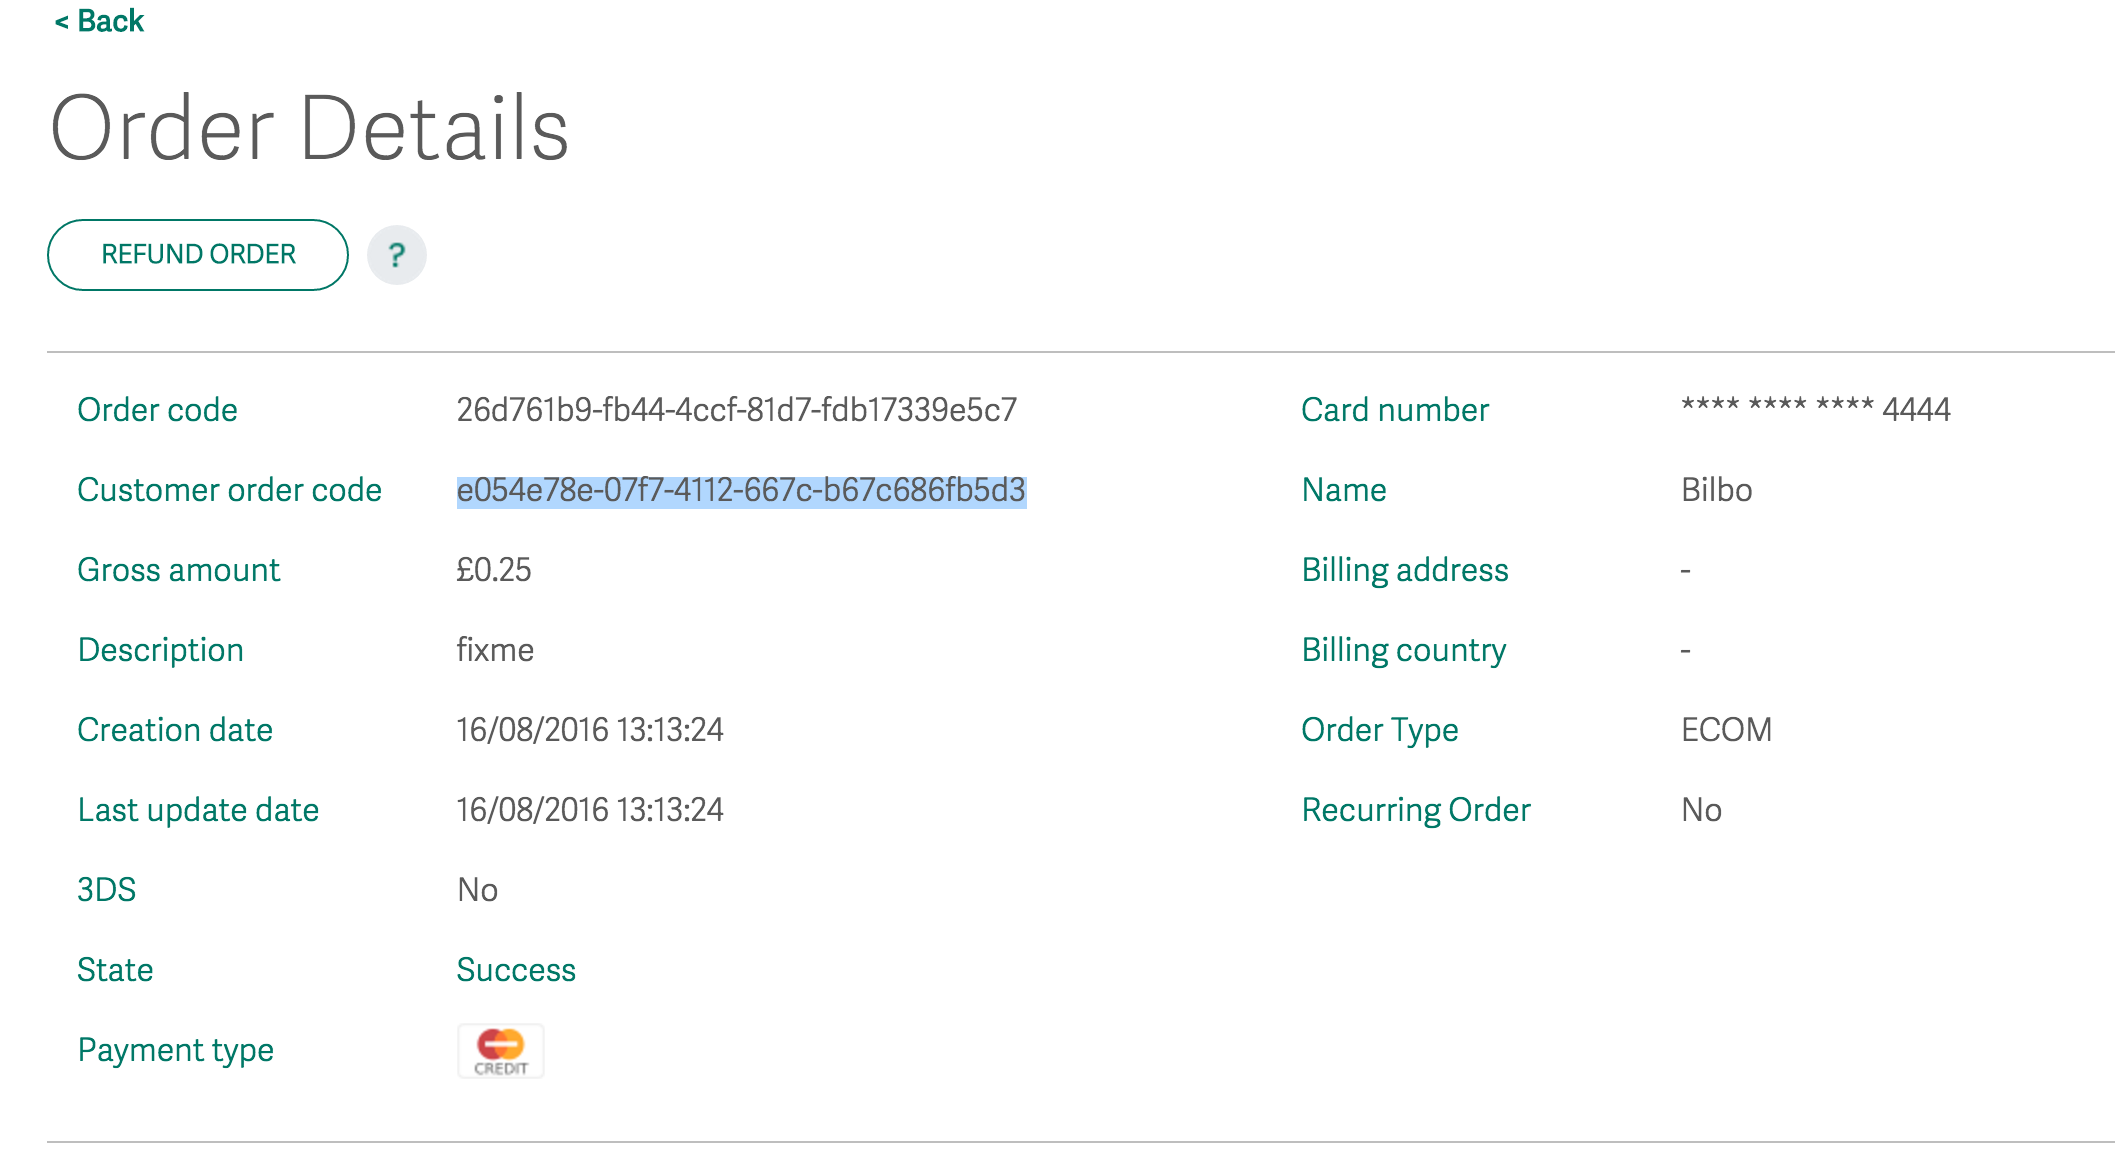
To see your test payments:
- Login to Worldpay Online.
- On the homepage, scroll down to the Recent Orders section.
- Your payments are here. You'll be able to see:
- Order Code - The order code
- Customer Order Code - The customer's order code
- Gross Amount - The gross amount of the order
- State - The state of the order. For example, SUCCESS or AUTHORIZED
- Payment type - The type of payment. For example, ECOM
- Order type - The type of order. For example, VISA_CREDIT or VISA_DEBIT
- Updated - The last time the payment state changed
For more information, refer to the Worldpay Online documentation.
Debugging
If you're having trouble, you can contact us at Innovation@Worldpay.com. Alternatively, you can raise an issue in GitHub.